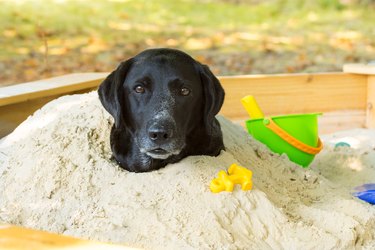
Life can't always be a day at the beach, but if it could, your dog probably would be thrilled to spend it there. Dogs love the opportunity to dig so they can place toys or bones deep within the earth or sand for safekeeping. Whether or not you have an ocean view, your dogs can spend lazy days playing in the sand in a simple sandbox you can build yourself. Use untreated wood, as treated wood contains toxins, which may cause harm to pets.

Video of the Day
Step 1: Decide on a location
Determine the location for your sandbox. Ideally, this should be a level area that gets part sun and shade. A slightly shaded area will protect your dogs from UV rays and possible heat exhaustion during play. Locate your sandbox a few feet away from gardens and property boundaries in case your dogs enjoy a running start when hitting the sand. Make sure that the location is visible from your home, as you'll need to supervise your dog's time outside.
Video of the Day
Step 2: Measure sandbox area
Measure your area using the measuring tape. Measure an 8-foot square, which will allow 64 square feet of play area for your dogs.
Step 3: Pound stakes into square corners
Mark the corners of your square using the stakes. Gently pound in your stakes with the rubber mallet.
Step 4: Define sandbox area
String the twine around the stakes, defining your sandbox area.
Step 5: Remove sod from area
Remove the sod using your garden spade. Spare sod can be used to fill in any holes in your yard from your dog's previous digging sessions.
Step 6: Dig square trench for sandbox

Dig a trench in a square shape along the outline of your sandbox. Your trench should be four inches wide by four inches deep so you can sink your first four timbers.
Step 7: Remove stakes and twine
Remove stakes and twine.
Step 8: Add layer of sand
Add 1-inch layer of sand in the entire square where you've removed your sod. Rake to level your sand.
Step 9: Place timber in trenches
Place your first four timbers into the trenches you dug in step 6. All four timbers should meet at the corners. If you need to cut your timbers but don't have tools, your lumberyard may be able to help.
Step 10: Connect first layer of timber
Connect the timbers together using 6-inch timber screws and the screwdriver. Sink your screws at an angle to fasten your timbers at the corners.
Step 11: Lay fabric over square
Lay the landscape fabric over the square. Make sure it lays flat against your layer of sand. If it doesn't, add more sand. Staple it to the timbers to hold the fabric in place while you finish building your sandbox for dogs. Keep power tools and staplers away from children.
Step 12: Add timbers to stack
Add your next four timbers in a square on top of your existing timbers.
Step 13: Connect second layer of timber
Connect the second layer of timbers to the layer of timbers beneath using the timber screws. Add a screw every 6 inches for maximum stability.
Step 14: Connect final layer of timber
Connect the third layer of timbers to the second layer of timbers beneath using the timber screws. Add a screw every six inches for maximum stability.

Step 15: Sand rough edges with sandpaper
Sand any rough areas using the sandpaper.
Step 16: Fill sandbox with play sand
Fill the sandbox with play sand. Now your canine companion can have fun digging and playing to their heart's content!